Welcome!

Welcome to Kitchen Revision ... a workspace for considering recipes and how they change, along with the cooks, the tasters, and the culture. I'm Beth Kanell, founder of Kitchen Revision. I love collecting and trying recipes -- and I'm endlessly interested in how history and culture shape us all. Plans for this space include co-authors, guest authors, plenty of discussion, and yummy diversions.

Wednesday, November 26, 2014

A Different Holiday Treat: Pumpkin Coffee Cake

My husband is not a pumpkin pie fan, but I am -- yet making a pumpkin pie for one person is usually not smart, because the extra slices don't freeze well. But cake slices do! So this recipe has become one of my favorites. It's also easy to share slices or more, with neighbors. I've made a couple of changes to it over the years since 1990: I use yogurt instead of sour cream, because I'm more likely to have it around. And the original last layer of topping was a streusel with butter and nuts, and I've simplified it to just brown sugar. There's already plenty of butter in the cake, and nuts can be an issue with a lot of people that I like to give treats to.

PUMPKIN COFFEE CAKE

Preheat the oven to 330 degrees, and grease a 13 by 9 inch pan.

Into a small bowl, measure out and lightly crumble with fingers:
1/2 cup (packed) light brown sugar

In a medium bowl, mix with a fork:
1 can pumpkin (the 15-ounce size; about 2 cups)
1 egg
1/3 cup sugar
1 tsp cinnamon
1/2 tsp nutmeg

In another medium bowl, stir together:
2 cups flour
1 tsp baking powder
1 tsp baking soda

In large bowl, either by hand or with an electric mixer, cream togetherL
1/2 cup (1 stick) soft butter
3/4 cup sugar
1 tsp vanilla

Add to large bowl, one at a time and beating well:
3 eggs

Measure out:
1 cup yogurt or sour cream

Now, add the flour mix and the yogurt or sour cream, alternately, to the big bowl, in two or three stages, beating each time. You should have a nice light buttery batter.

Spread HALF of the batter in the greased pan. Gently, spread over this the pumpkin mix. Then "dollop" the rest of the batter on top (I do it with 12 evenly spaced spoonfuls). Using your fingers, sprinkle the brown sugar over the top as a last layer.

Bake for 50-60 minutes.

Cool to room temperature before serving.

NOTE: If you don't have yogurt or sour cream, this recipe can also be done with 1 cup milk, BUT you need to change the 1 tsp baking powder plus 1 tsp baking soda, to 2 tsp baking powder instead, if you use milk.

Tuesday, November 18, 2014

"Batter Bread": Getting the Whole Wheat Recipe Right

I copied down a batter bread recipe (quick, simple, and no kneading!) from a Fanny Farmer cookbook back in 1990, and used it (slightly modified) often while feeding teens. Then, a couple of years into my marriage to Dave (we got together in 2002), I made a batch of this bread for him. He grew up on great bakeries in New Haven, CT, and the rather flat profile of this loaf didn't impress him. But in my regular bread pans, because the batter is pretty soft, I just couldn't get the loaf to rise to his standards (pun intended!).

The solution turned out to be not changing the recipe, but the pan. The one shown here really works nicely because it's narrower and has a better ratio of width to depth for batter breads. It hold quite a bit of batter, so instead of a 2-load recipe, this now makes one loaf plus a few mini items (muffins or small breads). The molasses gives it a lovely rich flavor.

GRAHAM BATTER BREAD

In large bowl, mix:
1/4 cup molasses or honey
1/2 Tbsp salt
2-1/2 cups very warm water

In mixing cup, stir together and let sit for 5 minutes:
1/4 cup warm water
1/2 Tbsp dry yeast (or 1 packet)

After the yeast is dissolved and a bit bubbly, add the yeast/water mix to the first mix and beat in:
3 cups whole wheat flour (I use locally grown and milled, but King Arthur also works well)

Then stir in
3 cups unbleached white flour

Cover and let rise half an hour or until doubled in size. Stir it back down and divide into greased pans. Cover loosely (a tent of waxed paper will work) and let rise until the batter is near the tops of the pans (20 minutes is usually enough).

Bake at 375 degrees for 45 minutes (30 minutes for "muffin pan" sizes). Tip out of pans to cool on rack.

Thursday, November 13, 2014

Apple Cake: Best Version Yet!

Autumn is apple season in Vermont, and last month when Dave's sis visited, I celebrated by baking an apple cake. (She helped!) This one is made with Empire apples -- not as soft as a Mcintosh, but still soft enough to give the right "feel" after baking. I've also fine-tuned the recipe in some other ways: There is a "secret ingredient" that I've adopted after seeing it in a few recipes that King Arthur Flour provides. It's an extract called Fiori Di Sicilia (flowers of Sicily, yes?) and mingles vanilla and citrus at once. If you don't have access to it, substitute a tablespoon of freshly grated orange rind and an extra half teaspoon of vanilla -- but I really like the way this extract scents the entire cake.

Here we go:

Preheat oven to 350 degrees. Grease a tube pan, preferably the kind that comes as two pieces (in a pinch you can do this in a pair of 9 by 5 inch bread pans, but it's prettier with the tube pan).

Stir together:
2 tsp cinnamon
1/3 cup sugar

Peel and slice 5 large apples (Empire preferred; should amount to 5 cups) and place the slices in a large bowl; stir in the cinnamon-sugar mix and let sit while you do the rest.

Beat in large mixer bowl:
4 eggs
1 cup vegetable oil
1/2 cup orange juice
1-1/2 cups sugar
1 tsp vanilla
few drops (about 1/8 tsp) Fiori Di Sicilia (see note above)

In a separate bowl stir together:
3 cups unbleached flour
3 tsp baking powder
1/4 tsp salt

Add the dry ingredients to the mixer bowl and beat only until well mixed.

Layer by thirds into the pan: one-third of the batter, then lay onto it one-third of the apples, and repeat twice more. If you're particular, make sure to save the prettiest apple slices for the top layer.

Bake 1-1/2 hours until golden on top. (If you used bread pans, start checking after just 1 hour.) Let cool 10 minutes and then remove the outer part of the tube pan. If it works for you, carefully lift the cake off the inner part, too. (It almost never works that way for me, so I slice the cooled cake carefully until the remainder will come off the inner part of the pan. Nothing wrong with serving this as a platter of slices!)

A note about the recipe: This version began from a Joan Nathan version that she calls "Jewish" Apple Cake, noting that the fact that the cake is made with oil, not butter, may have encouraged the name. Note that many "Jewish" apple cake recipes are designed to have layers of apple that ripple more in the finished cake. The rise in the oven will separate these slices enough, though, so that the finished cake is less regular than the layering makes it sound. I have also tried this with 1 of the cups of flour replaced with a finely ground whole wheat flour, which worked well; more than that, and Dave would realize that I was trying to turn the dessert into something overly "healthy."

Thursday, September 18, 2014

Zucchini Recipe Weather: On the Cusp of Autumn

There are a lot of jokes about what happens when you grow zucchini. Mostly they involve one seed, two seeds, 10 bushels of zucchini. And somehow three-fourths of mine overgrow, no matter how often I check the plants. So I was delighted to use two "baseball bats" of zucchini and half of a smaller one in this pair of recipes.

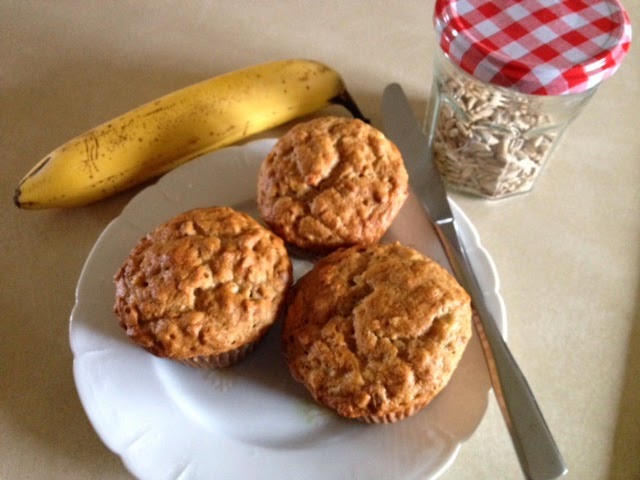
ZUCCHINI CRANBERRY PECAN BREAD

I like my zucchini bread moist and yummy. This goes beyond the usual "add some cinnamon" in a wonderful way.

Preheat the oven to 350º and grease two 5 by 9 inch loaf pans.

Coarsely grate enough zucchini to make 3 cups; set aside.

Beat together:
2 large eggs or 3 medium
1 cup sugar
2 teaspoons vanilla
2/3 cup melted butter (I actually used half melted butter, half corn oil)
dash of salt (if you use unsalted butter, up the salt to a quarter teaspoon)

Gently stir in the grated zucchini.

In a separate bowl, mix:
3 cups flour
2 teaspoons baking soda
1/2 teaspoon nutmeg
1 Tablespoon cinnamon
1 cup finely chopped pecans
1 cup dried cranberries

Add this to the liquids and stir briskly with wooden spoon or something similar.

Divide between the two pans and bake for 50 minutes. Cool in pans for 10 minutes and turn out onto wire racks -- or leave in the pans if you know you're going to each them right away, and serve at room temperature or a bit warmer.
IMPORTANT NOTE: if you like a "bread" that stays moist and rich, some of the "liquid fat" needs to be from something that's solid at room temperature, like butter or shortening. If you opt to use all corn oil anyway, cut it back to 1/2 cup and enjoy the bread sooner rather than later.

ZUCCHINI & ONION SLICES, PICKLED

If you use a box grater, there may be a slicer on the side; that's what I used this time, since I have a temporary ban on using my shiny new mandoline (two out of three times using it, I've draw significant blood). My food processor would not give me thin enough slices -- these should be almost transparent.

Slice, then gently toss together by hand:
4 quarts sliced zucchini
1 quart sliced peeled onions (about 3 large or 4 medium)

Put these in a nonreactive cooking pot (stainless steel or enamel) and set aside.

Bring to a boil:
1 quart cider vinegar
2 cups sugar
1/2 cup Kosher or pickling salt
2 teaspoons celery seeds
2 teaspoons dill seeds
1 teaspoon dry mustard

Pour boiling liquid and seeds over the vegetables and let sit, covered, for 45 minutes.

Meanwhile, bring 7 pint jars to a boil in a hot-water canner. Just as this comes to a boil, turn on the heat on the veggies. Bring them to a boil and cook 3 minutes, removing from heat promptly. (While this is cooking, take your jars out and prepare to fill them.)

Fill jars to within 1/2 inch of top; add lids and bands, and process for 5 minutes after water bath returns to a boil. Remove from water bath and do not disturb them until morning.

 NOTE: I've written this for people who have some pickling experience. If you have none: Read about it a few times first, and try to do your first recipe with someone else who's done pickling; there are many small tricks. Most important: do NOT use iodized (table) salt. It spoils the food.

Sunday, April 13, 2014

Sunflower Seed Muffins: Banana Oat Version, for a Rainy April Day

A couple of bananas were getting soft when I was scouting recipes last night, and I decided they'd go into morning muffins. I also wanted to experiment with sunflower seeds. Looking through recipes for the seeds, I noticed that some used "roasted" sunflower seeds, and some used raw. General consensus among the online nutrionists is, "Both raw and roasted seeds are nutritious and offer zinc, protein, folate, vitamin E and magnesium." Good deal, right?

I've had mixed results with toasting nuts in terms of timing and temperature, but it always brings out the flavor. I liked this process: Preheat the oven to 350ºF and sprinkle a single layer of sunflower seeds on a shallow baking pan. Pop into the oven and prepare to stir them regularly. The instructions I found said 30 minutes, but when I pulled out my seeds at 10 minutes to stir them, they were already clearly toasted and a quick taste confirmed they had become nicely crunchy. I definitely didn't want burned seeds, so ... I stopped at the 10-minute mark. After they cooled, I poured them into a clean lidded jar, as I had about a cup and knew I wouldn't be using them all the next morning.

Sunday morning, newspapers, coffee/tea, and baking: I used a standard banana muffin recipe here, with some extra cinnamon and nutmeg added; I only used 1 cup of unbleached flour (for a 12-muffin recipe, just under 2 cups is usual), plus 1/2 cup of rolled oats and 1/2 cup of oat flour, and I included 1/3 cup of toasted sunflower seeds.

Half an hour of baking at 350ºF was perfect. A nice treat for a rainy day, sweet with some crunch and lots of nutrition. Nope, it won't fit into the Paleo system that I'm also trying out ... but sometimes when an April shower strikes, it's better to be comfy and cozy anyway.

Friday, February 14, 2014

Maple Pecan Scones, Vermont Style

I ran across a recipe for Maple Pecan Scones recently with a mouth-watering photo and "pinned" it onto Pinterest, only to discover as I studied it further that the recipe didn't use any of our treasured Vermont maple syrup! I looked at another version from a local flour company, and it wasn't much better. So I finally found one that I could adapt to my kitchen with Green Mountain integrity (smile). Here we go.

Preheat the oven to 450 and lay a half sheet of parchment paper onto an insulated cookie sheet (or lightly grease a scone pan).

Mix 2 cups flour; 1 Tbsp baking powder. Cut in 5 Tbsp cold butter.

Crush 1/2 cup pecans (I do mine in a plastic bag, with the rolling pin - quick, and no added implements to wash) and stir into the flour mix.

Mix 1 cup half-and-half with 1/4 cup maple syrup, then add to flour/nuts mix and toss together. Shape as desired. Bake 12-14 minutes.

When mostly cool, top with glaze: 6 Tbsp confectioner's sugar, 2 Tbsp maple syrup (it whisks together very nicely and makes a good consistency to drizzle).

[Note: Any butter that seems to "melt out" during baking with soak back into the scones as they cool a bit -- no worries!]